
การ Scan SMB สำหรับเครื่อง Printer FujiFilm


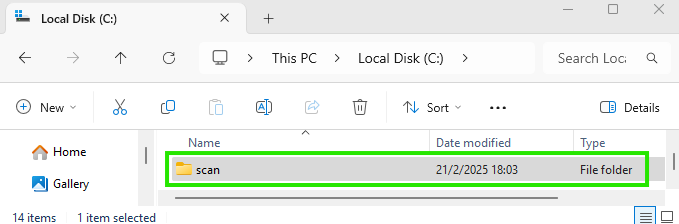
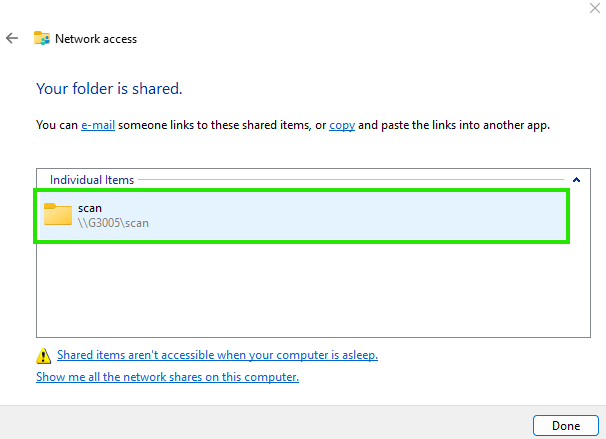
- สร้าง Folder เพื่อรองรับการ Scan จากเครื่อง Printer ทำการแชร์ Folder ให้เรียบร้อย
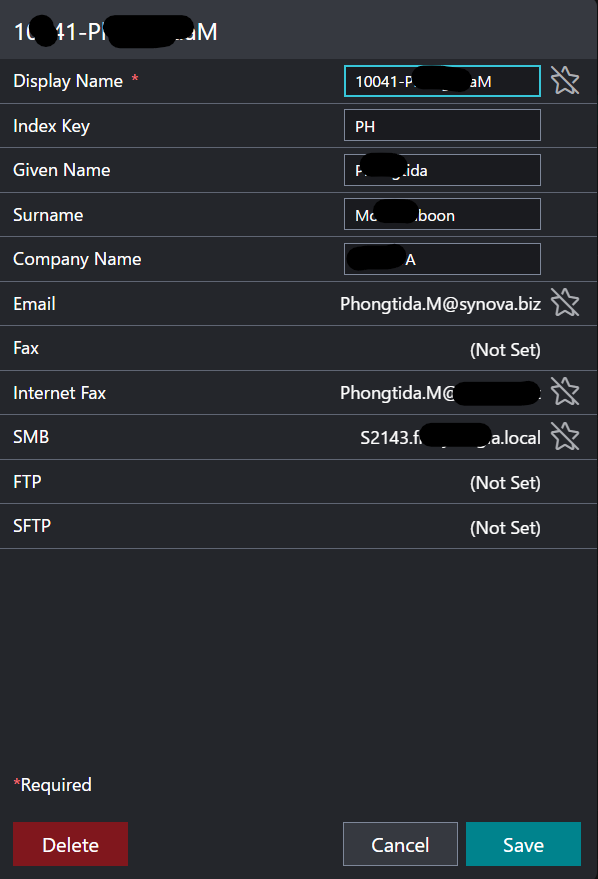
- จากนั้นให้เข้าไปยังหน้า Web Control ของเครื่อง Printer ทำการ Add New Contact ดังรูปด้านล่าง

- ใส่ข้อมูลประจำตัวของ User ให้เรียบร้อยโดยในส่วนที่สำคัญในการ Scan จะอยู่ที่หัวข้อ SMB ให้ Click เข้าไปในหัวข้อ SMB.
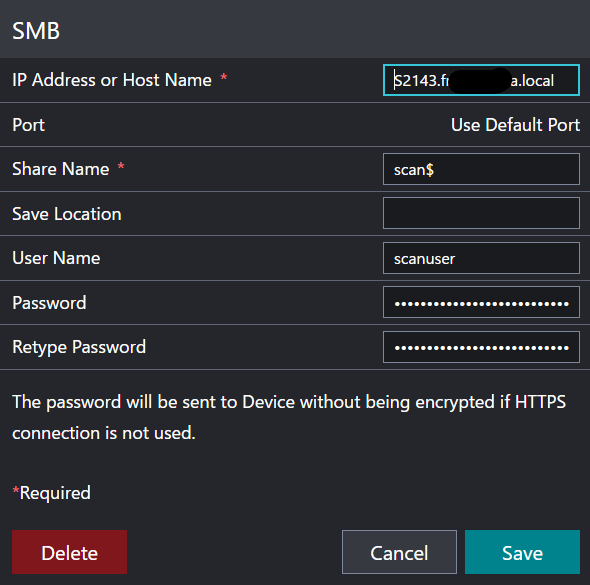
- IP Address or Host Name: ให้ใส่ชื่อเครื่องตามด้วย Domain name ที่ได้ Join Domain ไว้ เช่น: ชื่อเครื่องคอมพิวเตอร์.ชื่อDomain (S2143.fxxxxxxxxxxx.local)
Share Name: ให้ใส่ชื่อที่ได้ Share file ไว้
User Name: ให้ใส่ User local ของเครื่อง Computer ที่ได้ Share file ไว้
Password, Retype Password: ใส่ Password ของ User local แล้วกด Save.
- เพียงเท่านี้ก็จะสามารถ Scan file เข้าเครื่องของเราด้วย Protocal SMB ได้แล้ว
end...