
Set up Signature in Outlook


ขั้นตอนการสร้าง และ เพิ่ม email signature
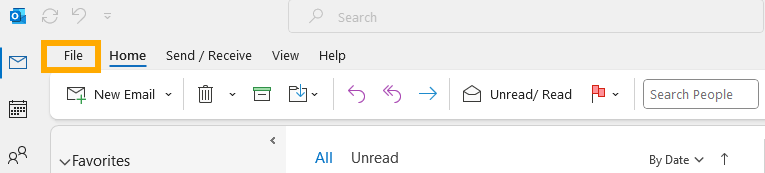
- เข้า Outlook เลือก File
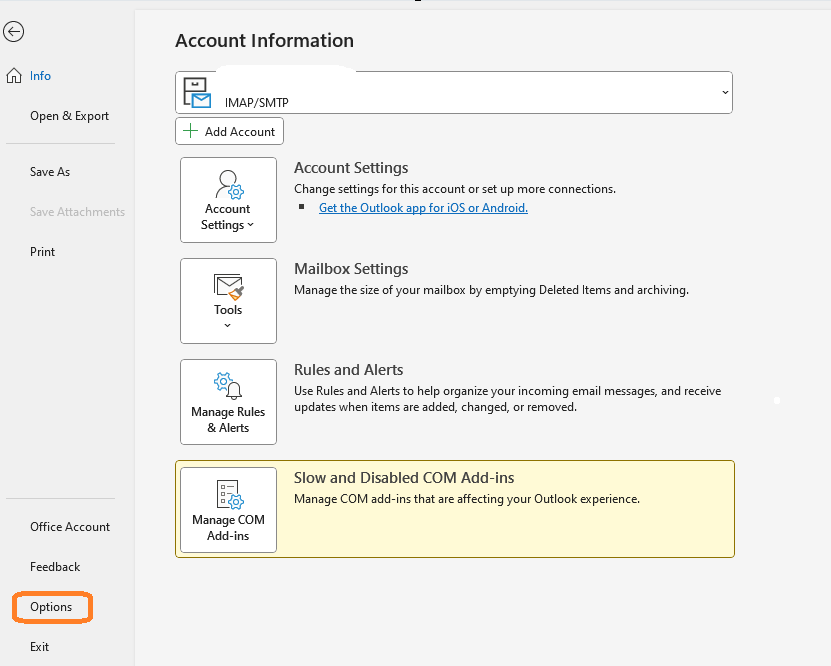
- เลือก Options
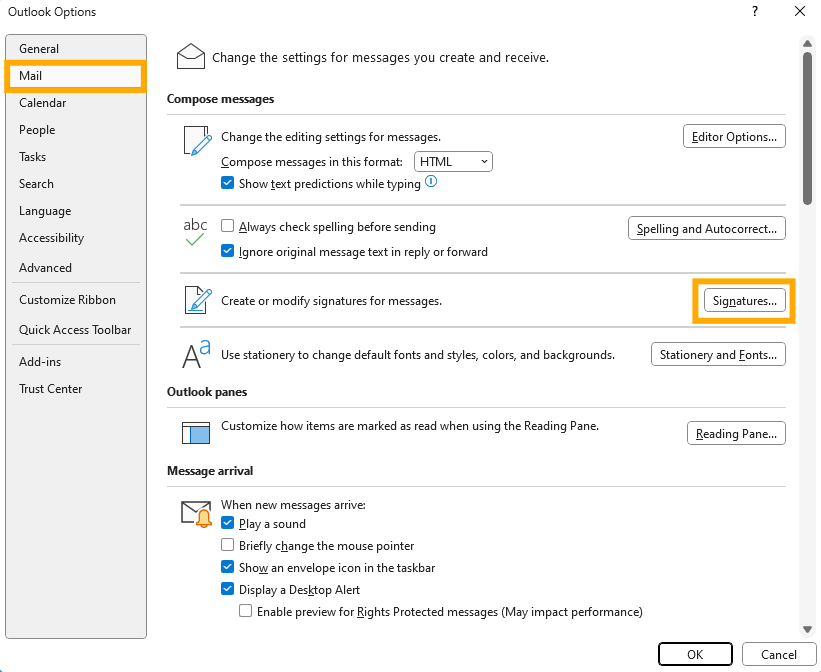
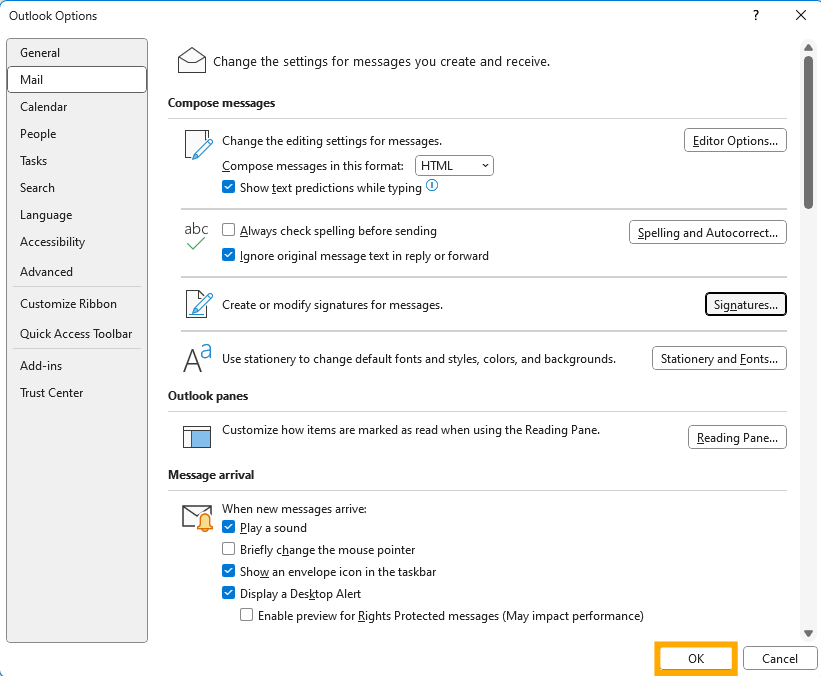
- เมื่อเลือก Options หน้า pop-up จะถูกเปิดขึ้น เครื่องมือด้านซ้าย ให้เลือก Mail แล้วเลือก Signatures
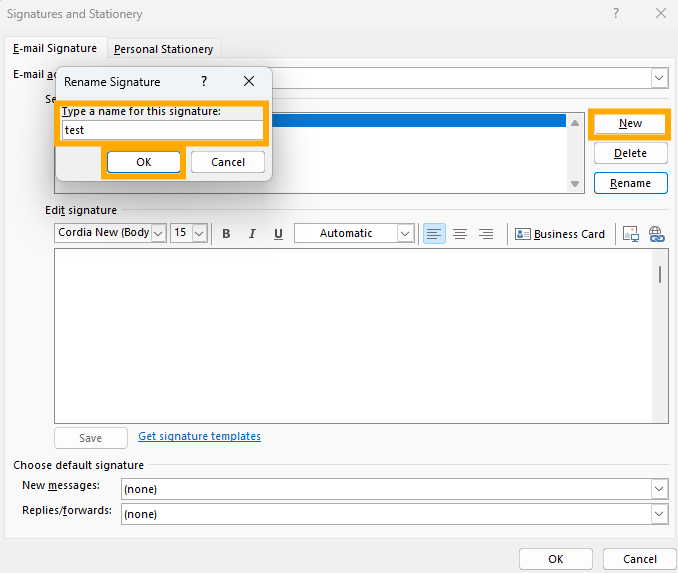
- เมื่อเลือก Signatures หน้า pop-up การสร้าง signatures จะถูกเปิดขึ้น ให้กด New แล้วตั้งชื่อ Profile สำหรับ signatures ที่ต้องการสร้างแล้วกด OK
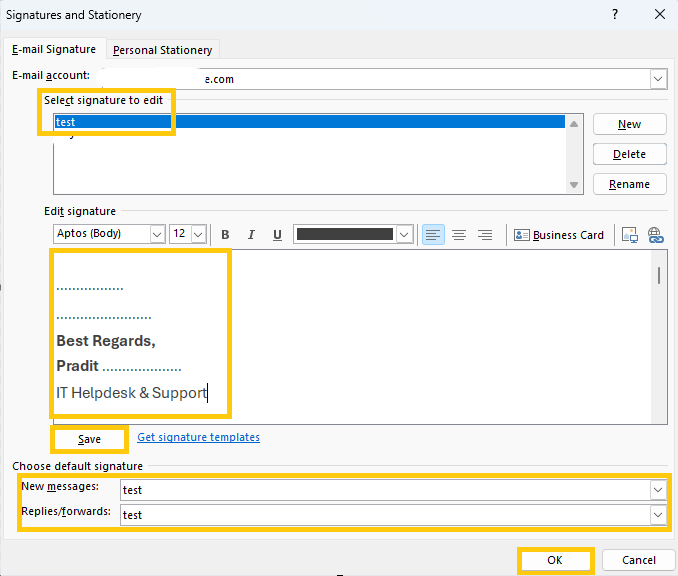
- ให้แน่ใจว่าเลือก Profile signatures ถูกต้องแล้วในช่อง Select signature to edit กรณีมี Profile signatures หลาย Profile หลังจากนั้นใส่ข้อความ signature ตามที่ต้องการในช่อง Edit signature แล้วกด Save, และตั้งค่า default signature โดยเลือก New messages: และ Replies/forwards: เป็นชื่อ Profile signature ที่เราได้ทำการสร้างไว้แล้วกด OK.
- กด OK อีกครั้งเพื่อออกจากการตั้งค่า
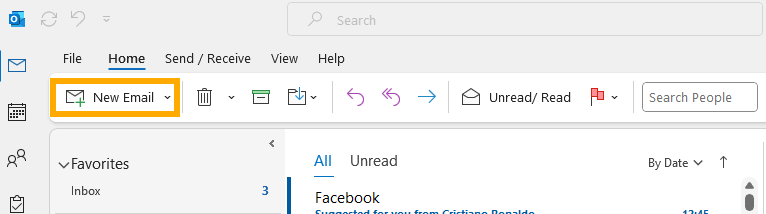
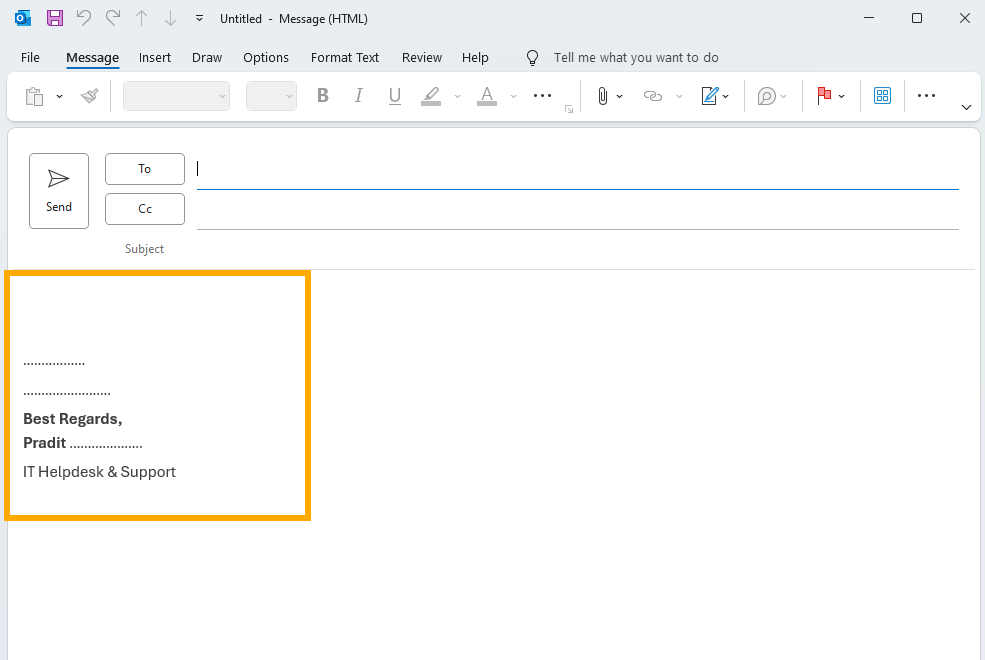
- การทดสอบใช้งานโดยกดที่ New Email จะได้ signature ตามที่ได้ตั้งค่าไว้ดังรูป.
end.