
Computer tip "Tuning the TCP Congestion Control Algorithm"


Tuning the TCP Congestion Control Algorithm in the Windows Kernel (Switching from CUBIC to BBR2)
Typically, Windows uses CUBIC for network congestion control—an algorithm that immediately reduces data transmission speeds upon detecting packet loss. However, in Windows 11 (version 22H2 and later), Microsoft has integrated Google’s BBR2 (Bottleneck Bandwidth and RTT v2) into the kernel. This algorithm calculates speed based on actual bandwidth capacity and latency, enabling full-speed data transmission—whether via VPN, streaming, or international file transfers—even in the presence of packet loss.
How to check the current TCP algorithm:
Open PowerShell (Run as Administrator) and type:
PowerShell
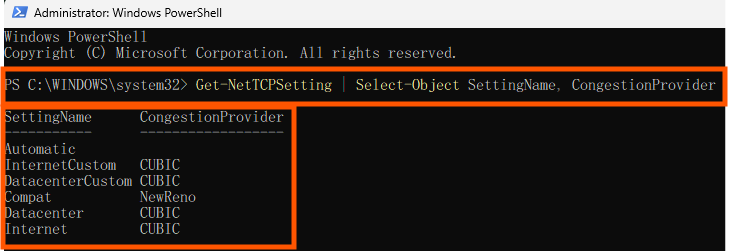
Get-NetTCPSetting | Select-Object SettingName, CongestionProviderVerification: If successful, the CongestionProvider column for the Internet profile will show CUBIC or NewReno.
How to switch to BBR2 on Windows 11
Run the following command in PowerShell (Admin):
DOS
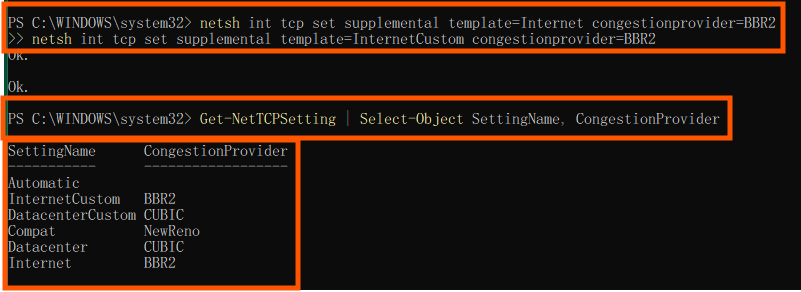
netsh int tcp set supplemental template=Internet congestionprovider=BBR2
netsh int tcp set supplemental template=InternetCustom congestionprovider=BBR2
Verification: When the Get-NetTCPSetting command is run again, the CongestionProvider value for the Internet profile immediately changes to BBR2 without requiring a system restart.
Key features of this customization
- Reduces Bufferbloat issues: BBR2 won't attempt to overload data until the router queue is full, thus reducing ping spikes while using heavy bandwidth.
- Boost upload speeds over long-distance networks: Experience noticeably more stable and full-speed file uploads to the cloud or streaming via OBS.
(Note: If you encounter issues where certain Localhost/Loopback applications run more slowly, you can revert to the original settings by changing "BBR2" in the command above to "CUBIC".)
end..