
How to restore the default network connection in VMware.


The simplest and most effective solution is to run VMware Restore Defaults command, which will reset and recreate the entire virtual network.
1.Method 1: Restore all network defaults (recommended - easiest).
1.1 Open VMware Workstation.
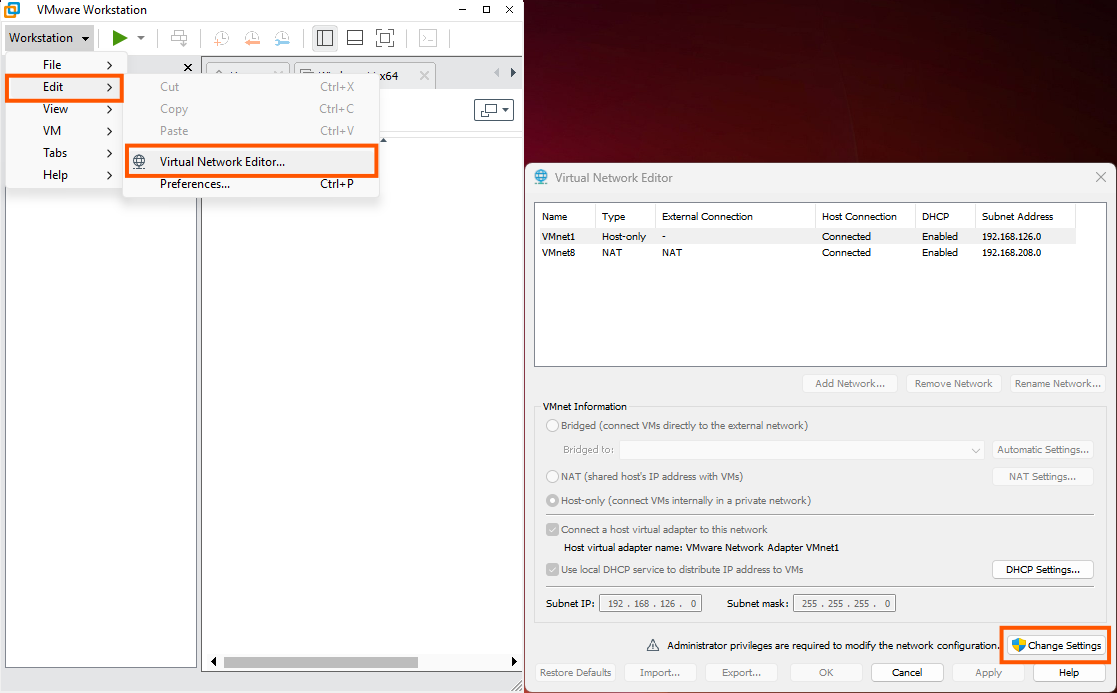
1.2 Go to the top menu, select Edit > Virtual Network Editor.
1.3 Click the Change Settings button in the bottom right corner (to enable Administrator privileges).
1.4 Click the Restore Defaults button in the bottom left corner.
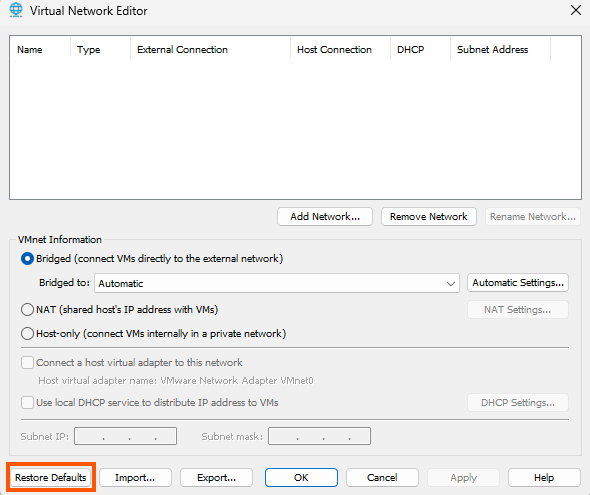
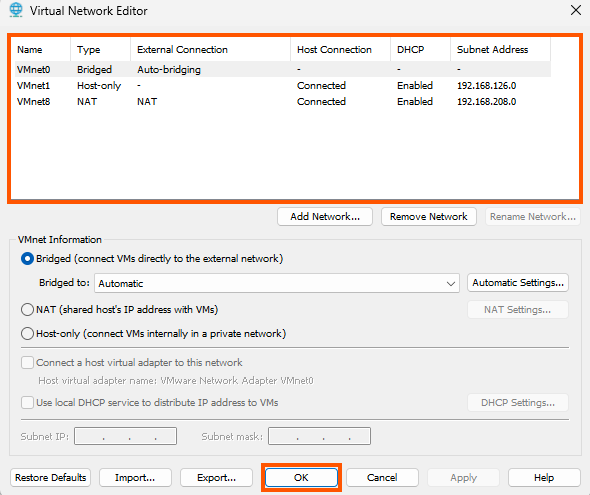
1.5 Confirm by clicking Yes and wait a moment. The system will then recreate all standard virtual networks (including VMnet8 which uses NAT for internet connectivity).
1.6 When finished, press OK.
2.Method 2: Manually restore Network Attraction (NAT).
If you don't want to reset the entire system and only want to restore the network with internet access:
2.1 Open Virtual Network Editor > Click Change Settings (Admin privileges)
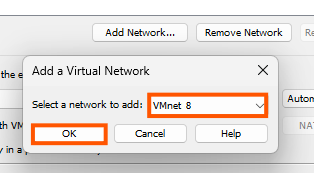
2.2 Click the Add Network... button.
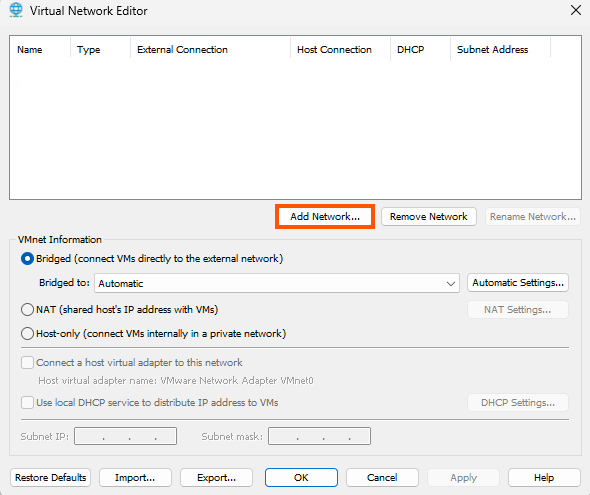
2.3 Select VMnet8 as the switch name (standard switch for internet use) and then click OK.
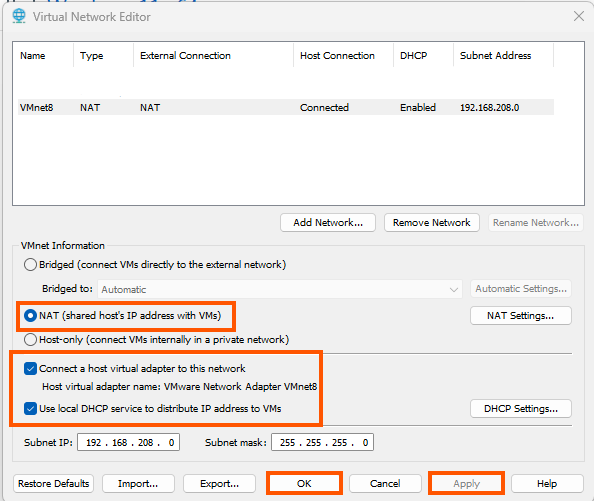
2.4 In the Network Type field below, select NAT (shared host's IP address with VMs).
Check the box next to the text:
- Connect a host virtual adapter to this network
- Use local DHCP service to distribute IP address to VMs
2.5 Click Apply and then press OK.
3.Final step: Verify the settings within the VM.
After following the steps above, double-check the settings in the virtual machine:
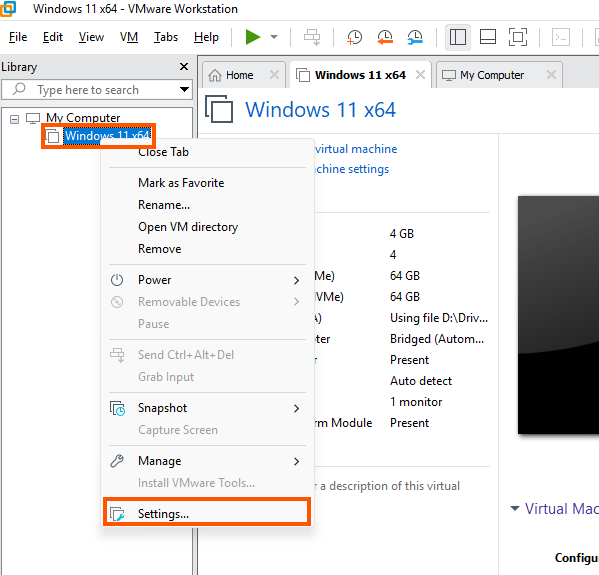
3.1 Right-click the name of the problematic VM > Select Settings.
3.2 Go to the Network Adapter section on the right-hand side and select NAT: Used to share the host's IP address.
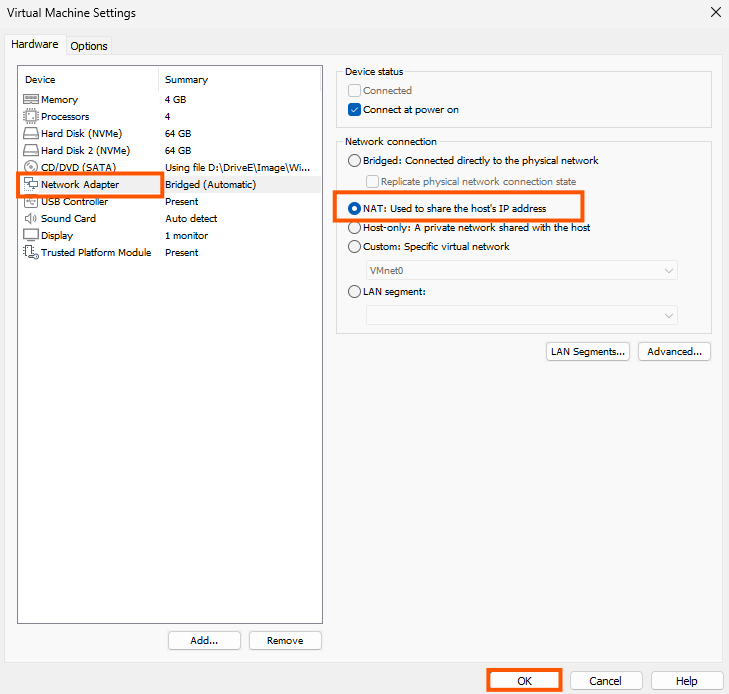
3.3 Press OK and try restarting the VM or disabling and restarting the graphics card in the VM to receive a new IP address.
finished..
end..