
How to setting Virtual AP on MikroTik by Winbox.


Setting up a Virtual AP on MikroTik allows a single wlan1 card to simultaneously receive WiFi signals from the main router (Station) and broadcast a new WiFi network (Access Point).
Detailed setup instructions.
Step 1: Create a Security Profile for receiving and broadcasting WiFi.
1.1 Go to Wireless > Security Profiles tab > press New.
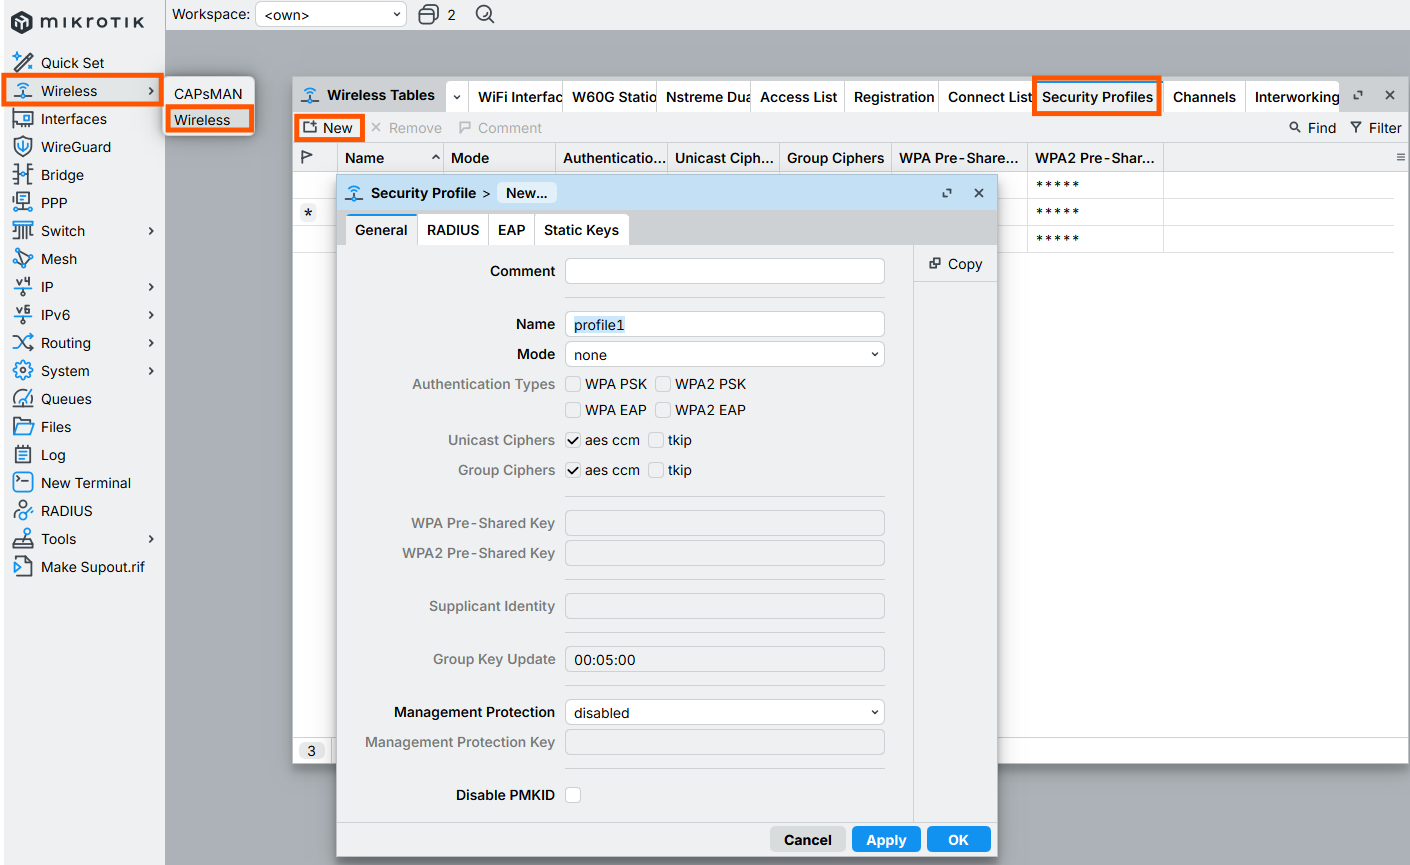
1.2 Signal profile to be received (Station):
- Name: profile-wifi-main
- Mode: dynamic keys
- Authentication Types: Check WPA2 PSK
- WPA2 Pre-Shared Key: Enter the password for your home WiFi/main router.
- Press OK
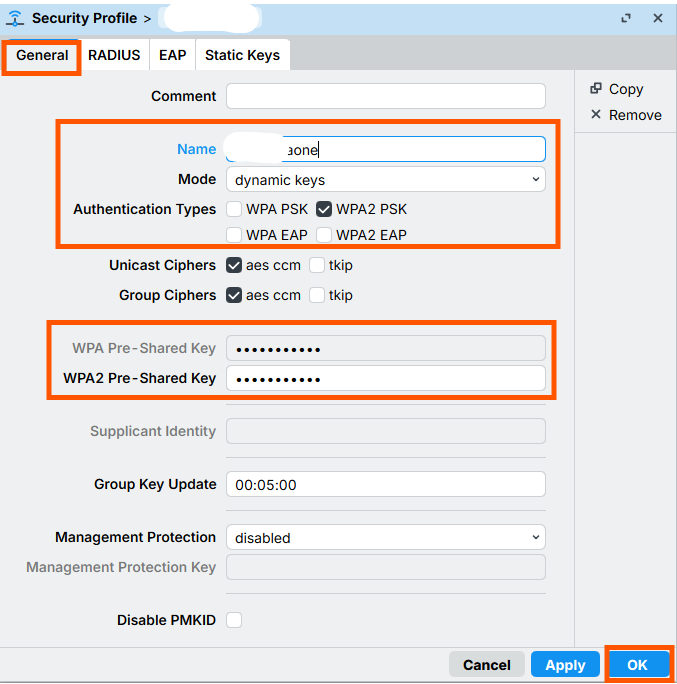

1.3 Profile for new WiFi access point (AP):
- Press New again.
- Name: profile-wifi-guest
- Mode: dynamic keys
- Authentication Types: Check WPA PSK, WPA2 PSK
- WPA2 Pre-Shared Key: Set a new WiFi password for the network.
- Press OK
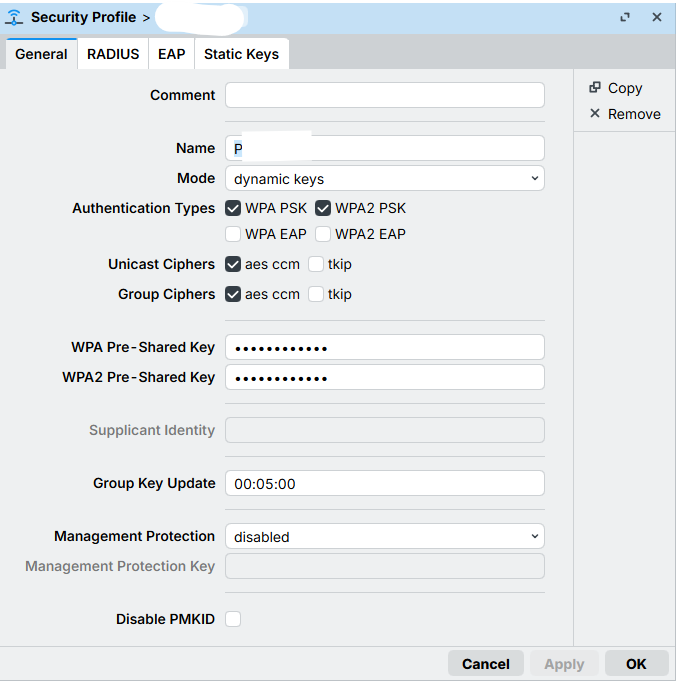

Step 2: Configure wlan1 as the receiver (station).
2.1 Go to Wireless > WiFi Interfaces tab.
2.2 Double-click to open wlan1 > then press the Enable button (checkmark icon).
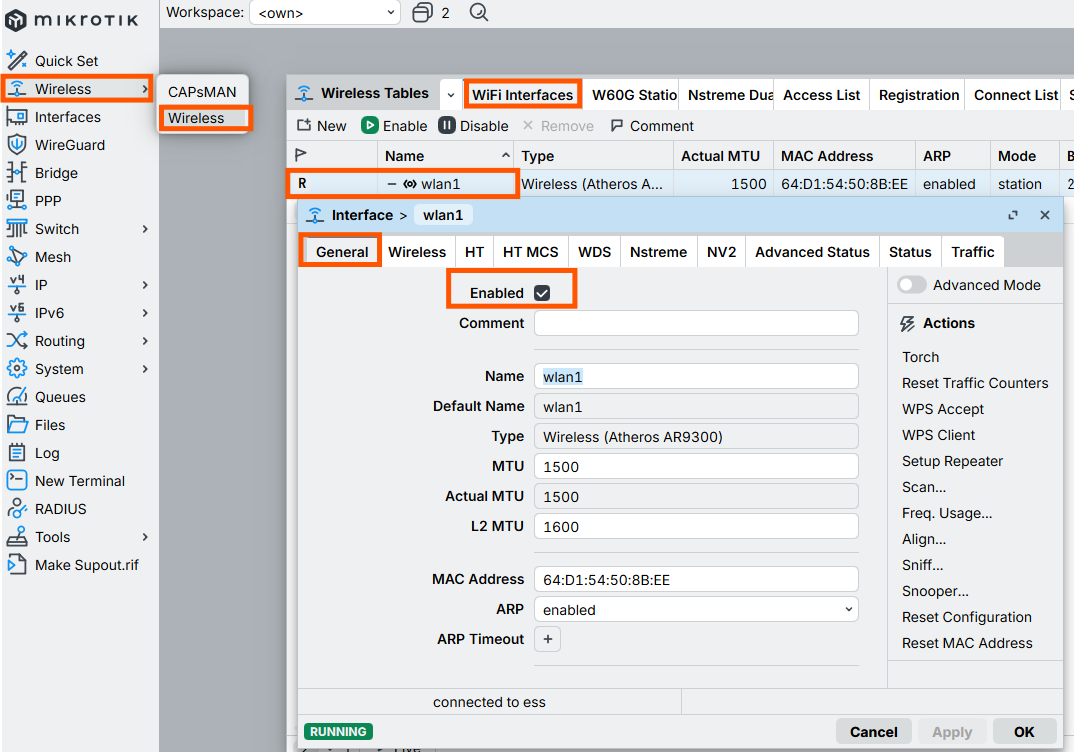
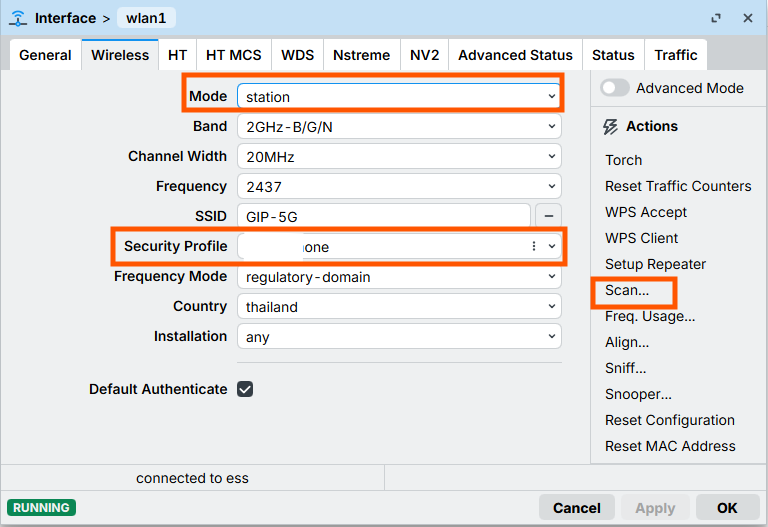
2.3 Go to the Wireless tab:
- Mode: Select station.
- Security Profile: Select profile-wifi-main
- Press the Scanner button on the right > Press Start > Select the desired primary WiFi name > Press Connect.
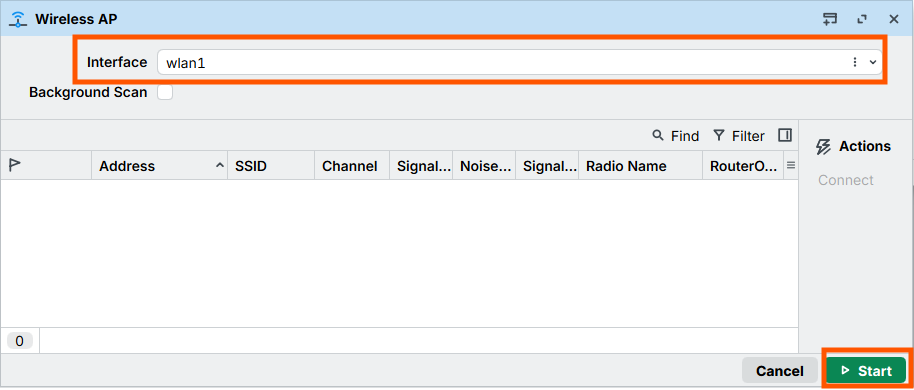
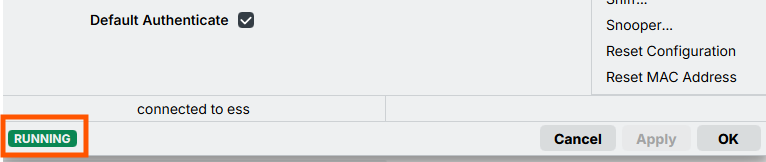
- Press Apply, then observe the bottom right corner. An "R" (Running) will appear, indicating that the connection is successful.
Step 3: Create a Virtual Interface (new WiFi distributor)
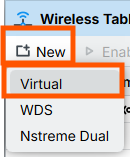
3.1 On the WiFi Interfaces page, press New > select Virtual.
3.2 Go to the General tab:
- Name: wlan2-virtual
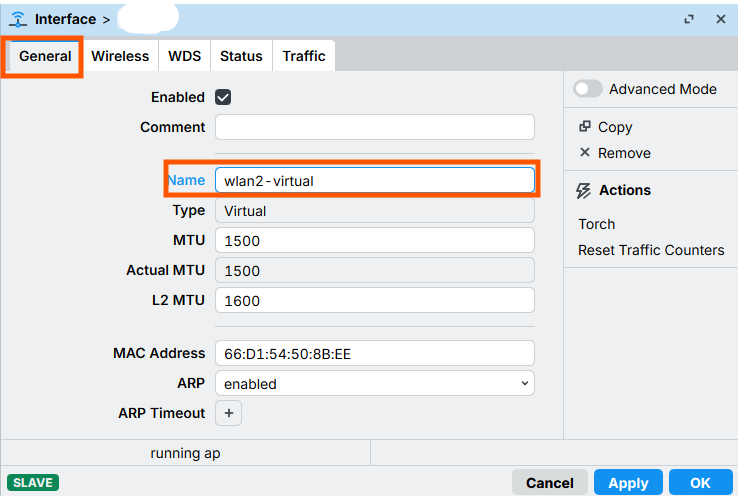
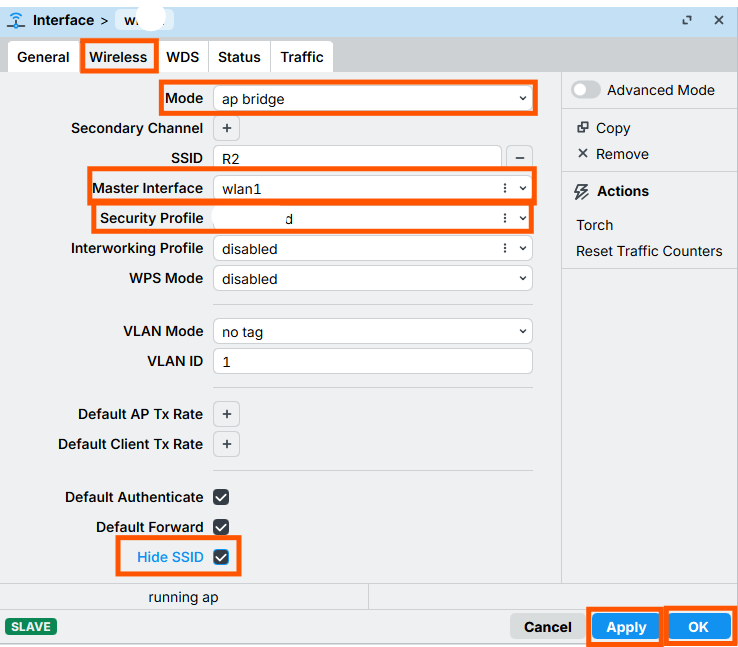
3.3 Go to the Wireless tab:
- Mode: Select AP Bridge
- SSID: Set the new WiFi name you want to broadcast.
- Master Interface: Select wlan1
- Security Profile: Select profile-wifi-guest
- Press OK
*note: if you want to hide SSID just check box "Hide SSID".
Step 4: Connect the interface to the Bridge (to provide internet access to connected devices).
To allow devices connected to wlan2-virtual and the LAN ports to receive IP addresses directly from the main router:
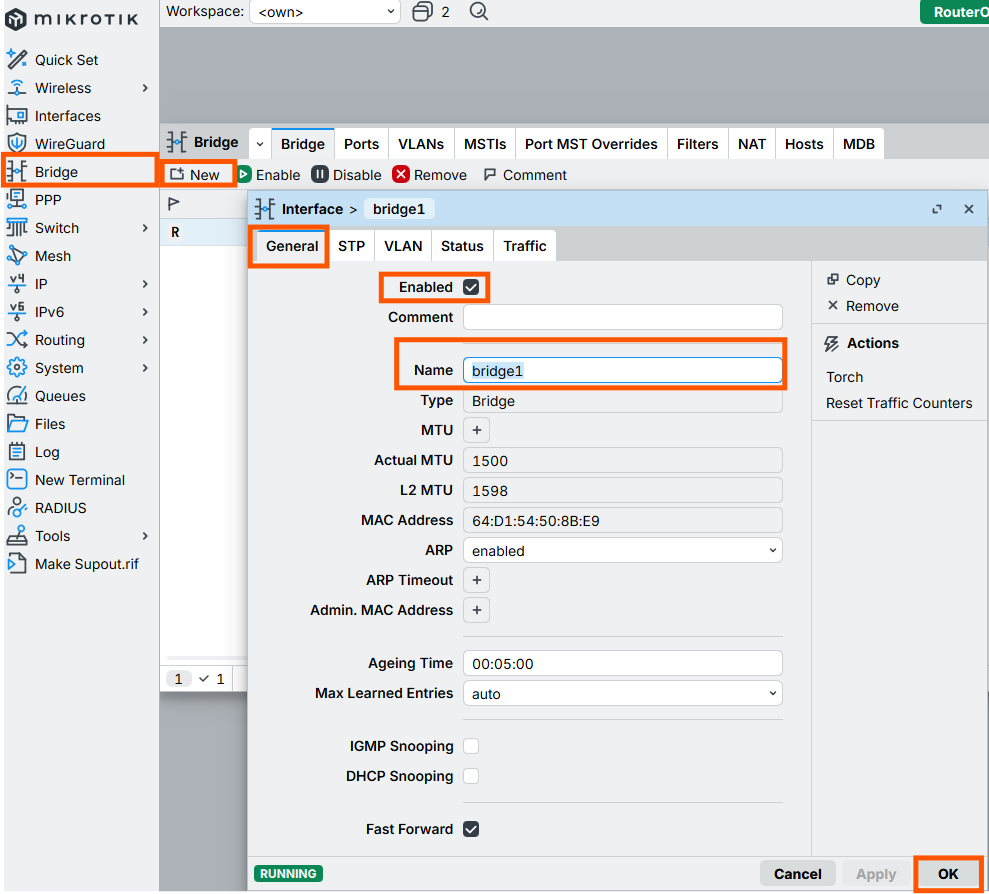
4.1 Go to Bridge > Bridge tab > press New (set a name, e.g., bridge1) > press OK.
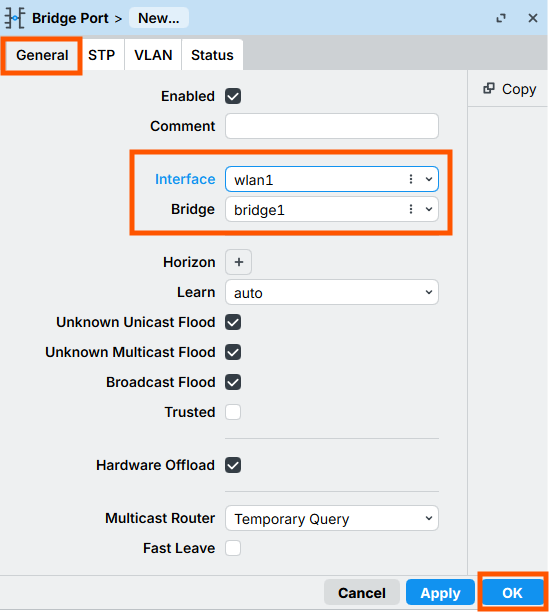
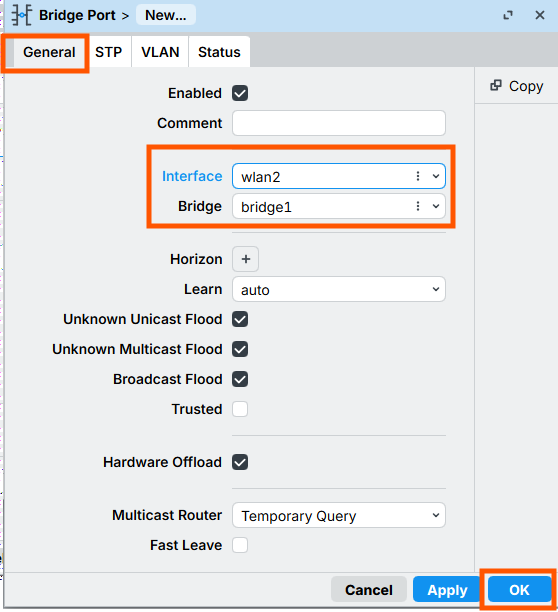
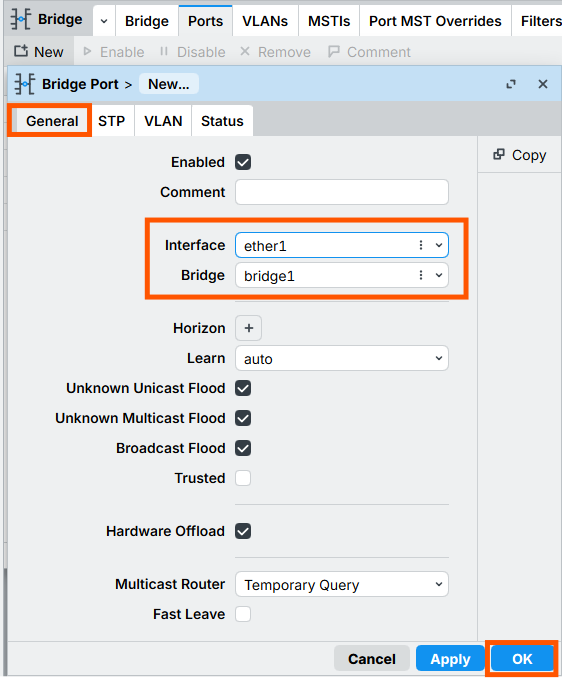
4.2 Go to the Ports tab > click New and add the following interface:
- Interface: wlan1 > Bridge: bridge1
- Interface: wlan2-virtual > Bridge: bridge1
- Interface: ether1 (or other active LAN port) > Bridge: bridge1
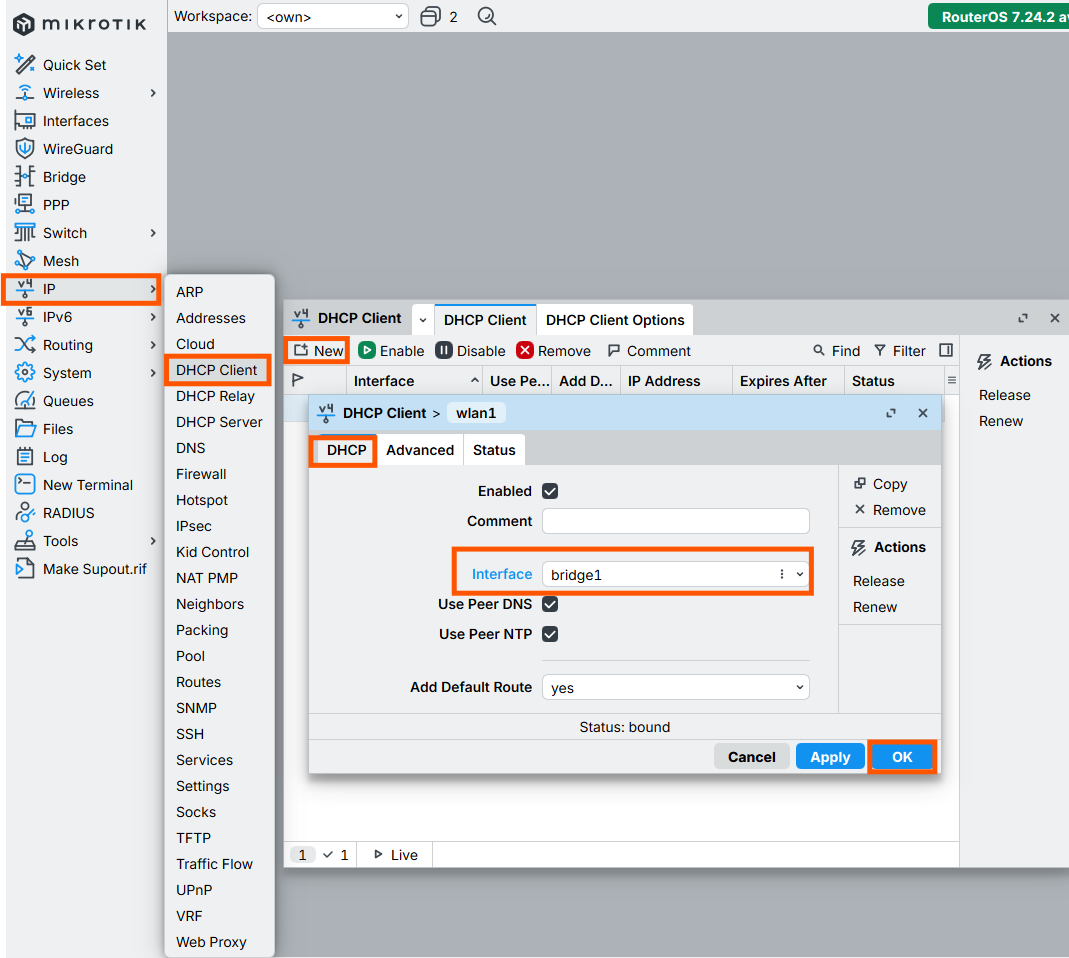
4.3 Go to IP > DHCP Client > Click New > Select Interface as bridge1 so that the MikroTik device can also receive an IP address from the main router.
finished..
end..