
How to setting up Mobile Hotspot on Windows 11 Pro.


For your Windows 11 Pro, follow these organized steps:
Mobile Hotspot Setup Steps
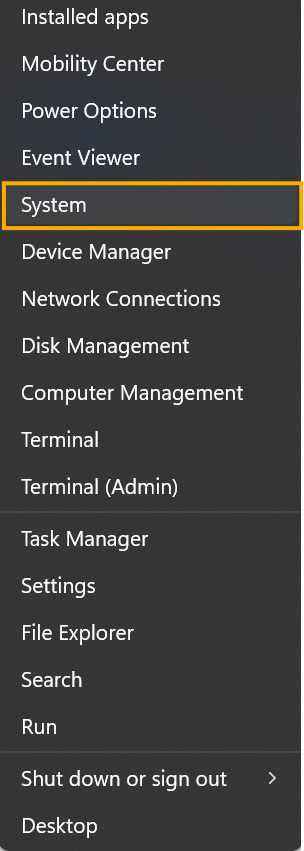
- Go to Settings:
- Press the Windows + I keys on your keyboard, or right-click the Start button and select Settings.
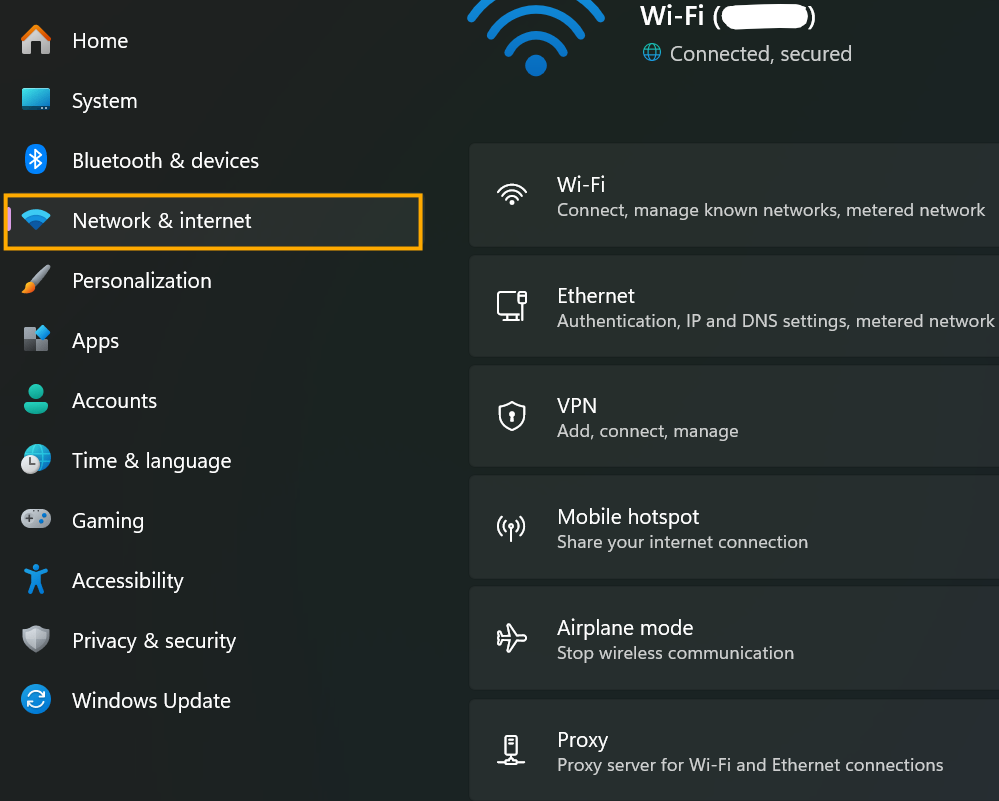
- Go to the Network menu:
- Select the left-hand sidebar that says Network & Internet.
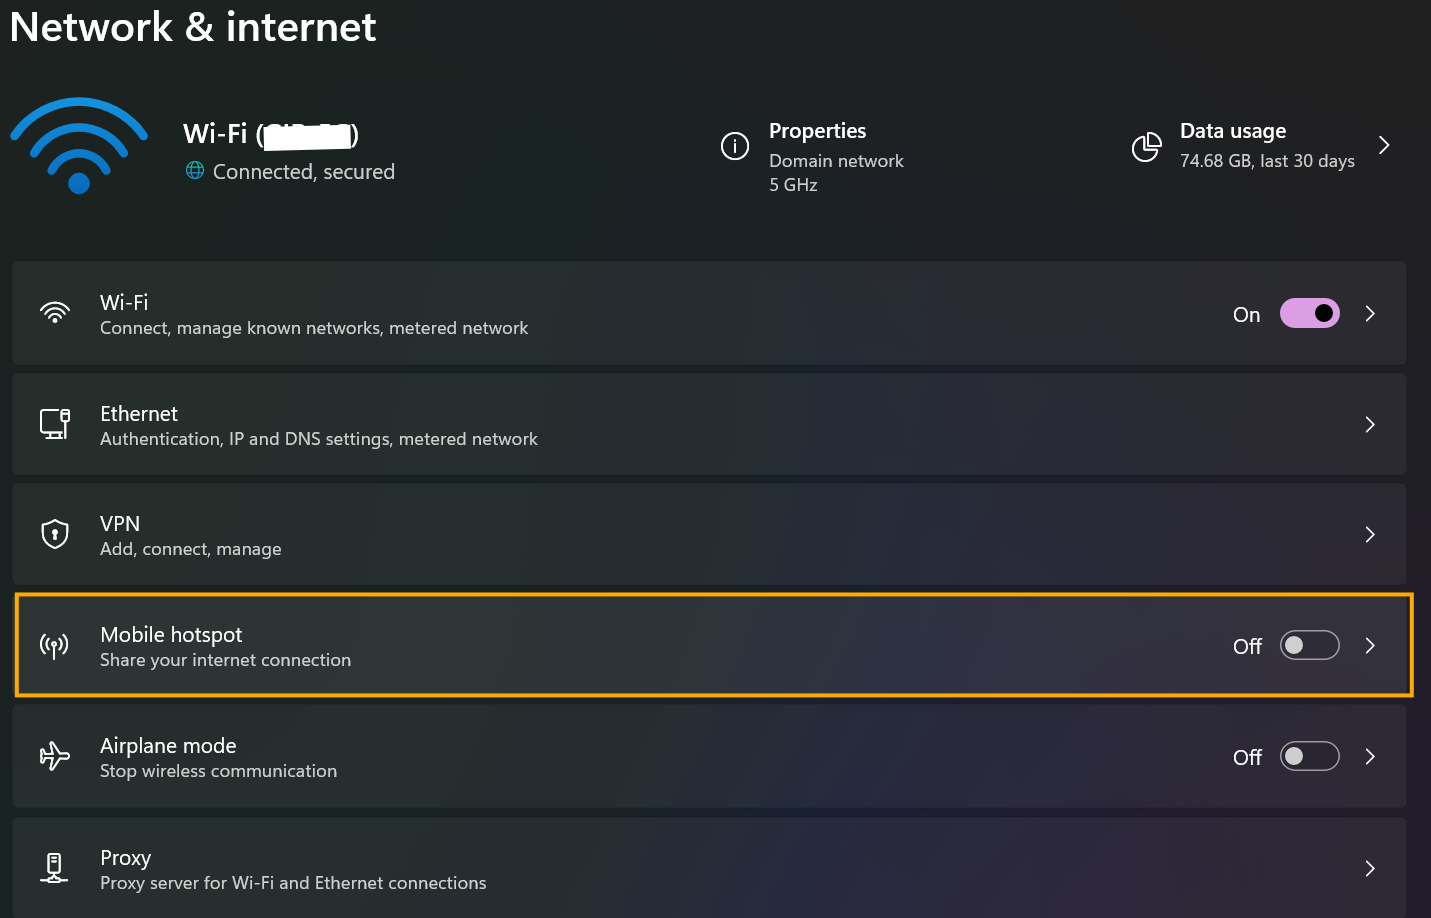
- Set up Mobile Hotspot:
- Look for the Mobile hotspot menu (don't press the switch yet, click on the menu first).
- Choose your internet source:
- In the "Share my internet connection from" field, select Wi-Fi (because you are connected to the main Wi-Fi network).
- In the Share over section, select Wi-Fi as well.
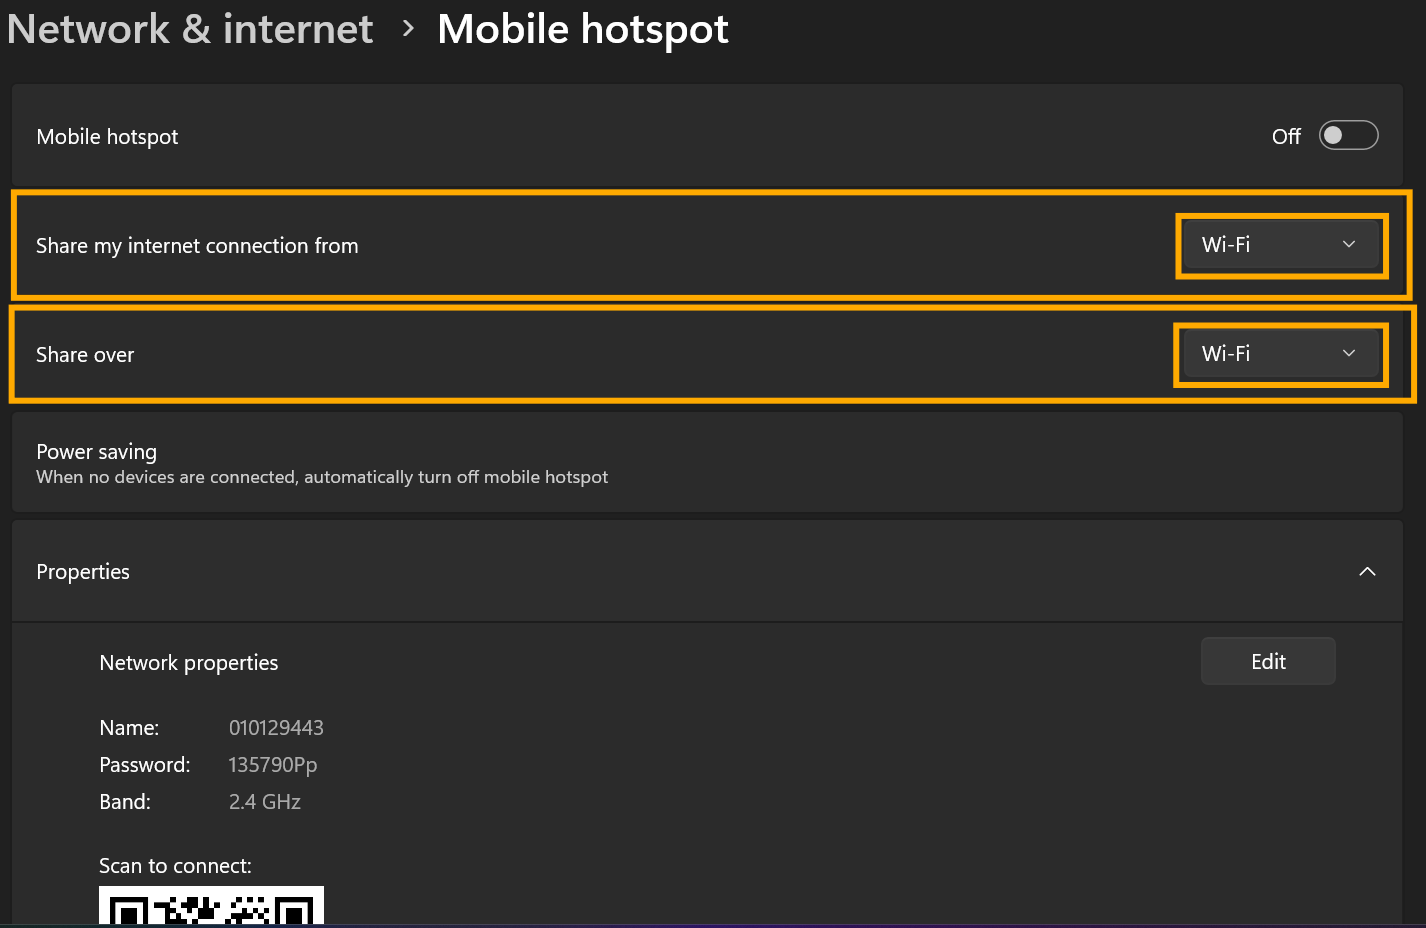
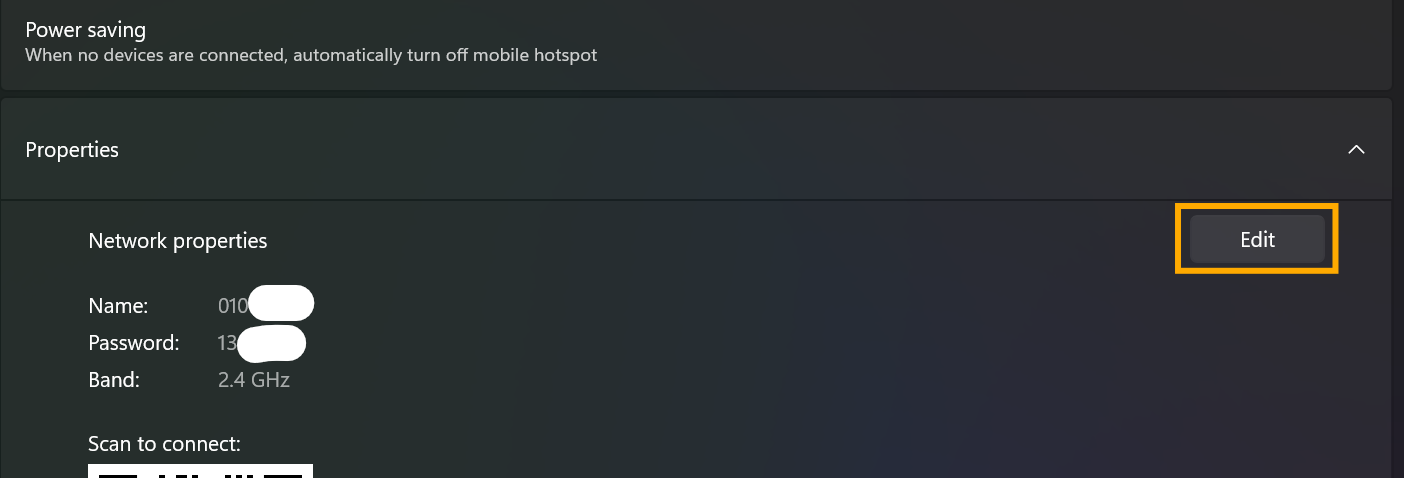
- Change username and password (Properties):
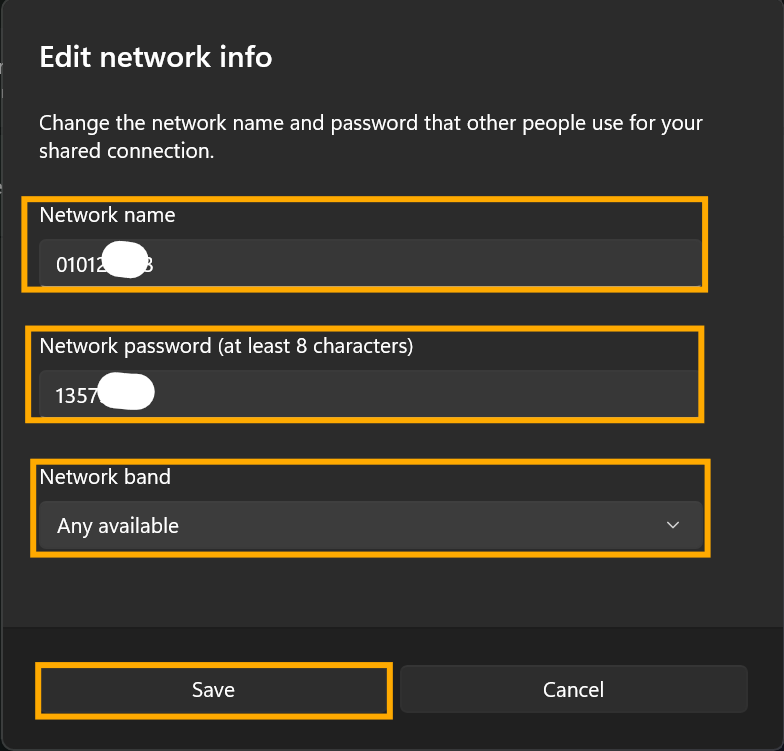
- Press the Edit button to set an easy-to-remember Wi-Fi name (Network name) and password (Network password).
- Tip: For the Network band setting, if your laptop is an older model, select 2.4 GHz. However, for all newer models, select 5 GHz for faster performance. Or, select "Any available" to be on the safe side.
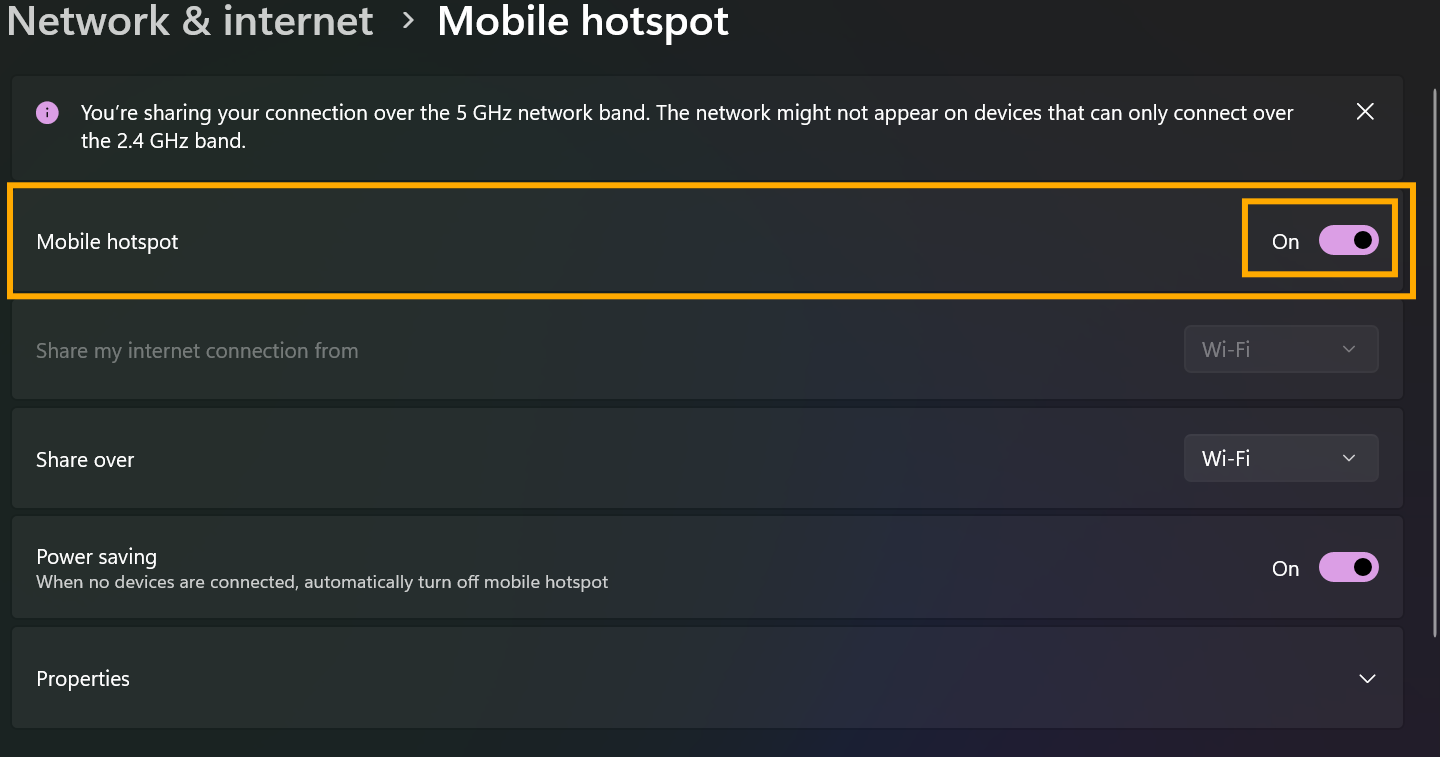
- Enable:
- Slide the Mobile hotspot switch at the top to On.
How to connect from another laptop.
- Turn on the laptop that will be receiving the internet connection.
- Search for the Wi-Fi network name you set in step 5.
- Enter the password you set, and you can use it immediately.
end..